On this page

The reason to start from failure rather than from process is that everyone in the conversation already knows what good beading looks like. What they disagree about is what went wrong, and a beaded dress rarely fails for the reason the buyer assumes. It fails at a seam, or under its own weight, or in the hands of a customer who cannot mend it — none of which look like a beading problem from the outside.
So the five failures come first, then the decisions that prevent them. Where the technique itself matters, our note on hand embellishment on womenswear covers it; for the adjacent method and its own failure modes, see how sequin dresses are manufactured. The commercial pages behind this article are our gala dress manufacturing and red carpet dress manufacturing ranges.
The five failures
Read this table first. Each row is a failure a buyer will eventually receive, and the third column names the decision that prevents it — which is the section of this article that deals with it.
| Failure | What the buyer sees | Prevented by |
|---|---|---|
| Motif discontinuity | The pattern breaks or drifts across a seam | Placement artwork on the pattern (placement and scale) |
| Weight distortion | Neckline pulled out of shape, bodice sagging by mid-evening | Placement limits and internal support (garment weight) |
| Seam damage | Broken beads, missed beads, thread showing along a seam | Seam engineering before cutting (seams) |
| Cost that arrives late | The invoice exceeds the quote after approval | Choosing the application route deliberately (application route) |
| Unrepairable after delivery | One missing bead means the dress is unusable | A repair plan built into QC (repair) |

Start with placement artwork and scale
The failure this prevents is motif discontinuity, and the reason it is the first section is that it is the only one that cannot be fixed later. Map motif direction, repeat and focal areas onto the garment pattern itself — not onto a sketch of the front, but onto the flat pieces as they will be cut. That single artefact is what makes seam continuity possible and what makes the quote comparable between two suppliers.
Then decide which of three structures the surface is. An all-over repeat is the cheapest per garment to plan and the least controllable at seams, because the repeat has to run continuously across a join. Engineered placement costs more to plan and is cheaper at the seam, because the motif can be drawn to resolve into the seam rather than across it. A mixed surface — embroidery for the body of the design and handwork for focal points — is usually the most commercially intelligent of the three, because it puts the expensive hours only where the eye actually rests.
Where beads must not go
Keep heavy beads away from seam allowances unless the method accounts for removal and reapplication. A seam allowance in a beaded panel has to be sewn with the beads out of the way, then the seam has to be pressed flat, and then the beads have to be reapplied over it — which is three extra operations per seam, on every seam, across the whole order. Where that has not been costed, it happens anyway and the labour line quietly doubles.
Three other zones deserve deliberate decisions. The underarm, because beads there abrade the wearer and the beads themselves. The seat and the back of a fitted skirt, because that is where abrasion against a chair happens and where loose beads detach first. And any area that will be taken in during alteration, because a beaded seam that has to be moved is a repair job rather than an alteration.
Then test weight and drape on the actual base fabric rather than on a swatch of the beading. Beading changes how a cloth falls, and it changes it most on the light fabrics that are usually chosen for it. A base fabric approved in its flat state has told you nothing about the beaded panel.
What a placement map contains
A placement map is the single most useful document in a beaded order, and it is not the same thing as a design drawing. A drawing shows the idea; a map shows each flat pattern piece with the motif drawn on it, so that the person cutting and the person sewing can see what has to happen at every join. Six things belong on it.
| Element | What it states | Why it matters at the machine |
|---|---|---|
| Direction | Which way the motif runs on each panel | Motifs cut against each other read as a fault under light |
| Repeat | The spacing and where it restarts | A repeat that restarts mid-panel produces a visible step |
| Seam markers | What happens to the motif at each join | Decides whether the seam is hidden or highlighted |
| Focal zones | Where density is highest | Concentrates the expensive hours where the eye rests |
| Bead-free zones | Seam allowances, zip margin, underarm, alteration allowance | Prevents the three most expensive rework causes |
| Density target | Beads per measured square, with tolerance | Turns final inspection from an opinion into a check |
Produce the map at the same time as the tech pack rather than after sampling. A map written after the first sample has been beaded is a map that documents what happened rather than one that directs it, and by then the seam decisions are already made.
- Map motif direction, repeat and focal areas on the garment pattern.
- Decide whether the surface is all-over, engineered placement or mixed embroidery and handwork.
- Keep heavy beads away from seam allowances unless the method accounts for removal and reapplication.
- Test weight and drape on the actual base fabric.
Choose the application route
The failure this prevents is cost that arrives after approval, and it is the most common commercial complaint in the category. Four routes are available and they are not ranked by quality; they are ranked by how much control you want over the motif, and control is paid for in hours.
The four routes and what each really costs
| Route | Motif control | Where the cost sits | Best for |
|---|---|---|---|
| Pre-beaded fabric | Lowest — you buy the repeat the mill made | Fabric price; very little labour | Volume ranges where the surface is a background |
| Machine embroidery | High — placement is programmed and repeatable | Setup and programming, not labour | Repeats and engineered placement at volume |
| Hand application | Highest — anything can be drawn and applied | Hours, and hours again at the seam | Statement pieces and focal areas |
| Hybrid | High where it matters, cheap elsewhere | Both, but only where visible | Most commercial ranges |
Pre-beaded fabric is efficient but limits motif control, and the limit shows at the seam: you cannot draw a motif to resolve into a join you did not design. Machine embroidery allows repeatability and placement precision and is the right answer when the same design runs again and again. Hand application supports irregular statement details and is the only route that can do genuinely free placement — but it raises both the labour and the repair requirement, because a hand-applied motif is also a hand-repairable one.
Hybrid methods can create richness without making every area hand-worked, and this is where most successful ranges settle. The commercial logic is that the eye reads contrast rather than density: a plain satin bodice with a densely worked focal panel reads as more luxurious than an evenly dense surface, and it costs a fraction as much because the hours are concentrated.
Whatever route you choose, ask for it to be named in the quotation with its assumptions — beads per square centimetre, whether motif matching applies, and how seam reapplication is priced. A quote that says beaded does not say which of these four it means.
Where the hours actually go
Beaded orders go wrong commercially because the estimate is made per garment rather than per operation. Six drivers move the hour count, and only the first is visible in a design drawing.
| Driver | How it moves the cost | What to fix if it is too high |
|---|---|---|
| Beads per square centimetre | Almost linearly | Reduce density outside the focal zone |
| Number of seams through beaded areas | Multiplies — removal and reapplication per seam | Re-route seams around the beading |
| Motif matching at seams | Several times a continuous motif | Accept continuous, or engineer the seam to hide the join |
| Panel count | One removal and reapplication per panel edge | Fewer, larger panels where the design allows |
| Bead size and bore | Breakage rate, needle life, handling speed | Standardise bead size across the design |
| Reapplication finish | Hand-finishing over every seam | Machine finish where it will not be seen |
Ask a supplier to quote against this table rather than against a photograph. Two quotations built on this structure are comparable line by line, and a supplier who can fill it in has costed the job rather than guessed at it.
- Pre-beaded fabric is efficient but limits motif control.
- Machine embroidery allows repeatability and placement precision.
- Hand application supports irregular statement details but raises labor and repair needs.
- Hybrid methods can create richness without making every area hand-worked.
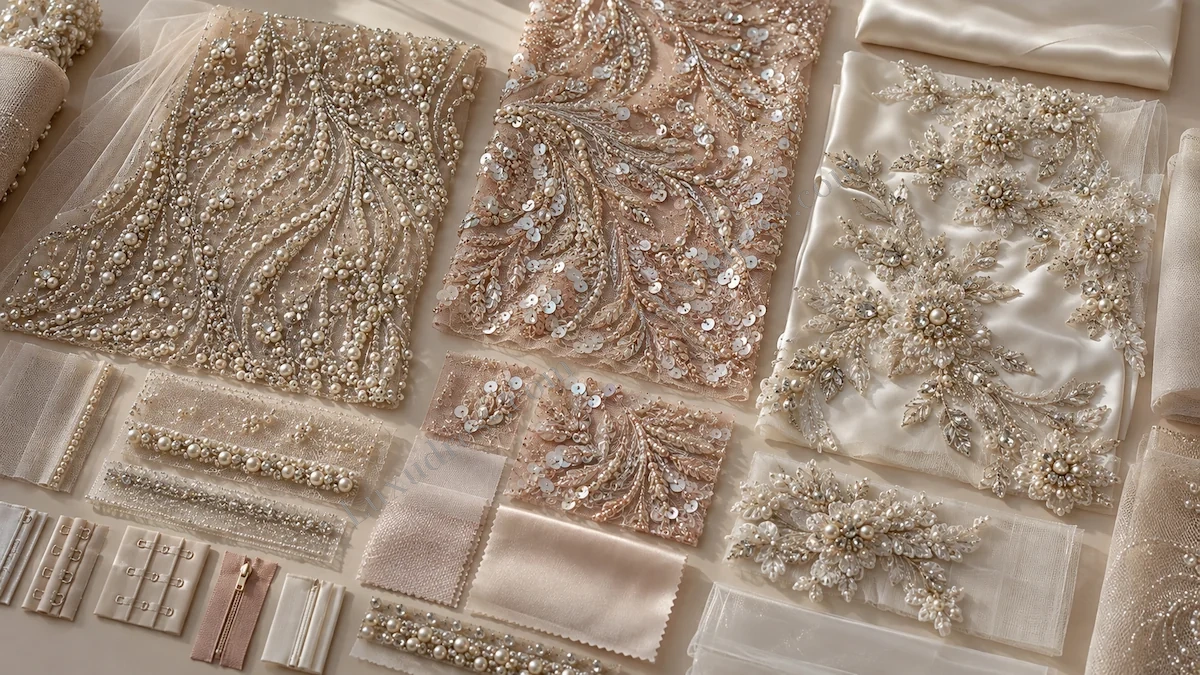
Engineer seams before cutting
The failure this prevents is seam damage: broken beads, missed beads, and thread showing through a motif. All three come from the same cause, which is that a beaded panel behaves nothing like a flat one on a sewing machine, and the machine does not know it is sewing glass.
Operators may need to remove beads from seam allowances before sewing and reapply them afterwards, and this has to be decided at the cutting stage rather than discovered at the machine. A pattern that puts three seams through a densely beaded area is a pattern that generates three removal-and-reapplication operations; one that routes the same beading around a single princess seam generates one. Both are the same design to the customer.
The seam allowance protocol
Five rules, and they are cheap to agree and expensive to ignore. Mask the beaded area of the allowance before sewing. Use a needle and a stitch suited to the bead size rather than to the base fabric. Clear the machine of bead fragments at a defined interval, because fragments blunt needles and blunt needles break beads. Press the seam from the inside over a soft surface, never directly on the beading. And check the first sewn panel against the placement map before the operator continues.
Needle breakage and seam bulk should be anticipated in the costing rather than absorbed in the run. A beaded seam is thicker than the pattern assumes, which means the presser foot rides up, the stitch length changes fractionally and the seam can pucker. Both are predictable and both are quoteable. Where a supplier has not accounted for either, the symptom appears as irregular seam quality in the middle of a batch, and by then half the order is finished.
Motif continuity matters most at centre front, at the side seams and along prominent princess lines, because those are the lines the eye follows. Zipper areas need enough clearance for reliable operation, which in practice means planning a bead-free margin either side of the zip and closing that margin at the end. A beaded zip is a zip that will fail.
- Operators may need to remove beads from seam allowances.
- Needle breakage and seam bulk should be anticipated.
- Motif continuity matters at center front, side seams and prominent princess lines.
- Zipper areas need enough clearance for reliable operation.
Control garment weight
The failure this prevents is distortion, and it is the failure that most often reaches the customer rather than being caught in the factory. Heavy embellishment can stretch mesh and distort necklines, and it does so gradually — the dress looks correct in a photograph taken in the first hour and incorrect in a photograph taken in the fourth.
The mechanism is simple once stated. Beads are mass, mass is load, and a garment that carries its load on a mesh base will extend that mesh over time. The neckline opens, the shoulder seams creep, the bodice lengthens fractionally and the waistline drops. Nothing has broken; the garment has simply stretched where it was asked to carry more than it was specified for.
Internal support may therefore be needed even if the outer design looks fluid, and this is the point most likely to be resisted on design grounds. A light internal stay, a stabilised neckline tape or a second layer at the shoulder is invisible and it is what allows a heavily worked surface to keep its shape. The alternative is a dress that fits on the hanger and not on the evening.
Hanger loops and packaging should carry weight safely, which is a separate specification from the garment itself. A beaded dress on a thin hanger, in a bag that hangs from the shoulder, concentrates the whole mass on two points of mesh; by the time it arrives those points have extended. Specify the hanger, the internal support and the packing method as part of the order, and say what the garment must look like on arrival rather than what it looked like when it left.
The test that matters here is a duration test, not an inspection. Hang the finished garment for several hours, then check the neckline and shoulder measurements against the specification. A dress that looks fine flat can behave differently after hours on the body or on a hanger, and the difference is measurable.
Weighing a panel before you commit
There is a cheap test that answers the weight question before sampling, and it takes twenty minutes. Take the base fabric you intend to use, cut a square of the real size of the largest beaded panel, apply the beading at the intended density, and weigh it against an unbeaded square of the same size. The difference, extrapolated across the garment, is the load the base fabric will carry.
| Base fabric | Behaviour under heavy beading | What to specify |
|---|---|---|
| Fine mesh | Extends measurably under load | Internal stay, stabilised neckline, lighter density |
| Tulle | Holds shape but the surface distorts locally | Support at the shoulder and waist |
| Stable woven | Carries load well but feels stiff | Softer underlining at the neckline |
| Stretch base | Recovery is the risk, not extension | Test recovery with the beading applied, not flat |
Two hundred grams spread across a bodice is survivable; the same two hundred grams concentrated on two shoulder seams is not. That is the whole reason the support decision belongs with the weight decision rather than with the design.
Run the test before the placement map is finalised, because the answer may change the density. It is much cheaper to reduce density in a plan than to add internal structure to a sample that has already been beaded.
- Heavy embellishment can stretch mesh and distort necklines.
- Internal support may be needed even if the outer design looks fluid.
- Hanger loops and packaging should carry weight safely.
- A dress that looks fine flat can behave differently after hours on the body.

Build repair into QC
The failure this prevents is the unrepairable dress: one missing bead, three months after delivery, and a garment the customer cannot use. It is the cheapest failure on this list to prevent and the most expensive to absorb, because the remedy is a return rather than a repair.
Keep spare beads and sequins from the production lot. Not a nominal quantity — enough to repair the garment properly, matched to the batch, in a bag that travels with the order. Beads are made in batches and a bead ordered six months later frequently cannot be matched in size, finish or colour, so the spares have to be captured at the time of production or not at all.
The repair pack and the inspection that goes with it
A useful repair pack contains four things: matched beads, a length of the bead thread, a note of the attachment method, and a note of what cannot be repaired in-house. For premium orders the pack should travel with the garment; for retail programmes it can stay with the brand, provided the brand can reach it. What matters is that somebody can act on it.
Inspection then covers the failures a repair pack cannot solve. Inspect loose threads, missing motifs, sharp edges and exposed knots. Sharp edges matter more than they sound: a bead with a rough bore or a cut thread end will abrade the wearer and will also abrade the neighbouring beads, so one bad bead becomes a cluster of lost beads over an evening.
Define acceptable spacing variation before final inspection, in numbers, because density is judged by eye and two inspectors will judge the same panel differently. Pick a measured square, count the beads in it, and set the tolerance. That converts a subjective argument at final inspection into a check, and it is the single most useful thing a buyer can write into a beaded order.
Six things to put in the purchase order
Almost every dispute on a beaded order traces back to something that was agreed verbally and never written down. Six clauses cover it, and all six are short.
- The placement map is the reference document, and it supersedes the design drawing.
- The density target is beads per measured square, with a stated tolerance.
- Seam reapplication is priced per seam, and the number of seams is named.
- Bead-free zones are listed by name: allowances, zip margin, underarm, alteration allowance.
- Spare beads matched to the production batch travel with the order.
- The garment is inspected after hanging for a stated period, not only flat.
None of these add cost by themselves. What they do is move the conversation from after delivery to before production, which is the only place where a beaded dispute is cheap to resolve.
- Keep spare beads and sequins from the production lot.
- Inspect loose threads, missing motifs, sharp edges and exposed knots.
- Define acceptable spacing variation before final inspection.
- For premium orders, consider a small repair pack.

Practical buyer worksheet
Ten fields. For a beaded style the first and the last are the two that most often decide whether the order is profitable:
- Target customer and use occasion
- Target retail and wholesale price
- Target ex-factory or landed cost
- Core fabric and backup fabric
- Size range and base fit size
- Colour count and continuity colours
- Critical construction risks
- Approval sample required
- QC checkpoints
- Latest acceptable delivery date
FAQ
Is hand beading always more premium?
No. Design, placement, consistency, attachment strength and finishing matter more than the application label, and a well-executed machine-embroidered panel will read as more expensive than careless handwork. The question is where the hours are spent, not whether hands were used.
Why are beaded dresses expensive?
Six lines, and they compound. The beads themselves, which are bought by weight and by batch. The labour of application, priced by hours. The seam preparation, which adds operations on every join. The slower handling throughout the line, because a beaded panel cannot be moved quickly. The repair and QC time, which is higher than on any other construction. And the rework risk, because a beading mistake found late is stripped rather than corrected.
Can beaded dresses be altered?
Yes, but the beads may need removal and reapplication around the seam being altered, which makes the alteration a beading job rather than a sewing job. That is why the alteration allowance matters more here than in any other construction: design in enough seam allowance to move the fit without disturbing the motif, and say on the hangtag what a fitter is allowed to touch.
What should buyers inspect?
Motif placement, loose or missing beads, sharp edges, seam continuity, zipper function and packing protection — against a placement map and a measured density tolerance agreed before bulk. Without those two documents, final inspection is an opinion rather than a check.
Next step
We produce beaded, embellished and hand-worked occasionwear at our production facilities in Guangzhou and Dongguan, including placement artwork, seam engineering and the repair pack. Send the silhouette and the surface design with quantity, size range and delivery window, and we will come back within twenty-four hours with the application route, the hour estimate and an itemised quotation. See gala dress manufacturing and red carpet dress manufacturing for the constructions we run.
One habit worth building on any beaded programme: photograph the finished garment flat, then hang it for a working day and photograph it again under the same light. Comparing the two images catches the failures that inspections miss, because they are gradual rather than discrete. A neckline that has opened by eight millimetres, a shoulder that has crept, a panel that has started to sag under its own beads — none of these show in a single inspection and all of them show in a comparison. It costs one day on the schedule and it is the cheapest quality control available on a beaded order.