On this page
- Why handwork behaves like a production stage
- Not all hand embellishment is the same process
- Stage 1 — allocation and scheduling
- Stage 2 — application and setting
- Stage 3 — inspection and repair
- How an embellishment artwork is specified
- Attachment security and wear testing
- Where the calendar actually goes
- What a handwork schedule actually looks like
- How hand embellishment is costed
- What to check on an embellishment sample
- The handover checklist
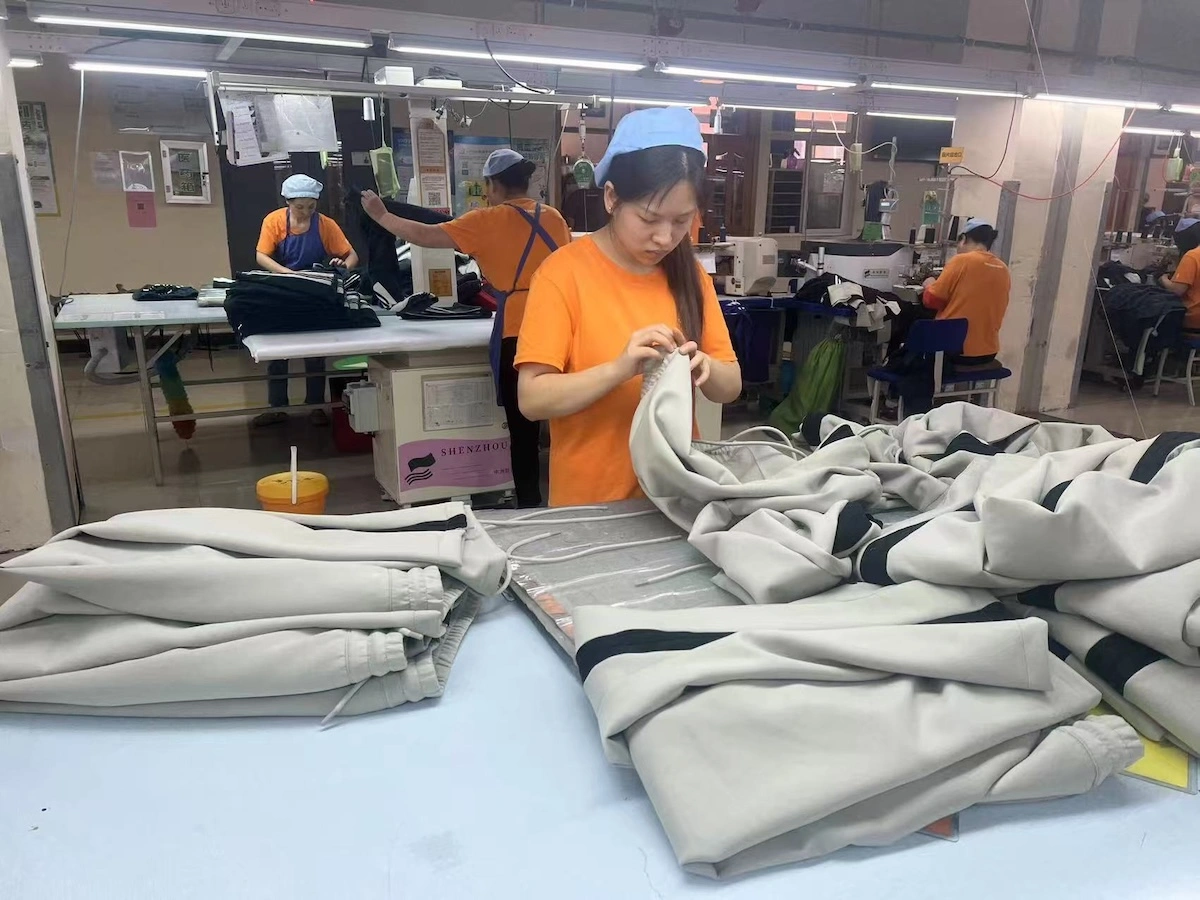
A style is due on the 14th. The cloth is in, the pattern is approved, the line is clear, and the order slips by ten days. The reason is not the fabric, the fit or the sewing — every one of those finished on time. It is the hand application of the embellishment, which waited for a workbench, then ran longer than the estimate because the placement map took more passes than anyone allowed for, and then needed repair on a share of pieces assembled with slightly uneven tension.
Nothing went wrong. The order was planned as though embellishment were a finishing step applied after production, when in fact it is a process that consumes production time — measured in people, days and benches rather than machines and metres. That distinction decides whether a hand-embellished style ships on schedule or explains itself.
This article follows hand embellishment through its stages, sets out how the different techniques actually differ, marks where the calendar goes, and ends with the checklist that should be signed off before a handwork window opens.
Why handwork behaves like a production stage
Hand embellishment runs on labour capacity, not machine throughput. Like a sewing line, it is scheduled — allocation first, application second, inspection and repair third — and each stage has its own queue.
| Stage | What it consumes | Where it usually slips |
|---|---|---|
| 1 — Allocation and scheduling | Bench hours, trained hands, and a slot that does not overlap with other handwork | Planned as a finish after production rather than a stage inside it |
| 2 — Application and setting | Time per piece, per zone, per density | The estimate used one sample piece as the rate for the whole run |
| 3 — Inspection and repair | Skilled hands again, competing with stage 2 | Rework discovered late, in a queue with no slack |
The single most useful thing a buyer can know: hand embellishment competes with itself. Two hand-decorated styles in one factory are not two independent orders — they are two claims on the same benches, and often on the same small group of operators.
Not all hand embellishment is the same process
"Hand embellishment" covers at least five materially different techniques, and they do not share a time model, an attachment method or a repair risk. This matters because the differences decide the price, the substrate, and how much of the run will need rework.
First, one distinction that gets blurred in quotations: hand-applied is not the same as hand-guided. A component set by hand is placed and fixed by a person. A component applied on a hand-guided machine — a tambour frame, a guided embroidery head — involves a person steering a machine. Both are legitimate, they cost differently, and they behave differently in repair. A quote that says "hand" should say which one.
| Technique | How it is attached | What the substrate has to do | Repair risk | What drives the time |
|---|---|---|---|---|
| Hand beading | Beads sewn individually with needle and thread, often with more than one pass per bead | Carry mass — weight accumulates, so the panel has to hold beads without distorting | High. A missing bead in a regular pattern is visible immediately, and the thread path has to be matched | Beads per unit area × passes per bead |
| Hand-sewn sequins | Individual sequins sewn, sometimes with a bead through the hole | Tolerate abrasion — sharp sequin edges wear the thread and the cloth beneath | Moderate. A missing sequin reads as a gap in a reflective surface | Sequins per area, plus orientation discipline |
| Appliqué | Fabric motifs cut and stitched or bonded, with the edge finished | Take an added layer without pulling — appliqué changes weight and stiffness locally | High. A lifting edge is progressive: once it starts, it spreads | Perimeter length, not covered area |
| Hand embroidery | Thread only; the structure comes from stitch density and direction | Be stabilised, since dense work pulls the substrate | Moderate to high. Pulled thread work cannot be locally re-tensioned easily | Stitch count and density |
| Stones and crystals | Either adhesive-set (heat or glue) or mechanically set with claws or a sewn base | Low for adhesive-set; a claw setting needs a base to sew into | Very high for adhesive-set. Adhesive failure in wear or cleaning cannot be repaired invisibly | Stones per area, plus the setting method |
| Mixed media | Any combination, in one zone | Load the panel evenly while carrying different heights and weights | High. Repair has to match whichever neighbour it sits beside | Component count, plus the transitions between materials |
Three practical consequences fall out of that table.
A single per-garment or per-square-metre price cannot describe all of them. Beading and appliqué are priced by completely different drivers — beads against perimeter length. A brief that says "embellished bodice" without naming the technique is not yet quotable in a comparable way.
Repair risk is not proportional to cost. Adhesive-set stones are among the cheapest to apply and the hardest to repair, because a failed bond leaves a mark and a setting cannot be re-created invisibly. Appliqué is comparatively cheap and has a progressive failure mode. The technique with the lowest application cost is not the one with the lowest total risk.
Where a technique sits in the sequence changes with the technique. Appliqué and beadwork on flat panels can be worked before assembly. Stones on a shaped bodice are often set after the bodice holds its form, because the placement follows the finished surface. Mixed-media work frequently has to be sequenced in layers, with one material set before the next is positioned relative to it.
Stage 1 — allocation and scheduling
Handwork begins before anything is embellished. It begins when the style is allocated a bench and a window.
Bench capacity is the constraint
A factory with handwork capacity has a finite number of benches and a finite number of trained hands. That capacity is shared across every embellished style in production at that moment. A new style does not add capacity; it joins a queue.
This is why the useful question at quotation is not "how long does the embellishment take?" but "which other embellished styles are in the factory during that window?" The second question is what actually determines the date.
Handwork has to be sequenced against the garment
Embellishment attaches to a garment that is somewhere in the production sequence, and where it attaches matters:
- On pieces, before assembly. The most controllable route. Panels lie flat, work to a placement map, and can be inspected before they become a garment. It also allows the embellishment to be positioned relative to the pattern piece rather than to the finished shape.
- On a closed garment. Necessary when the layout crosses seams or when the design is decided on the finished silhouette. It is slower, harder to hold to a map, and harder to inspect.
- On a finished garment, as a final layer. The most expensive per hour, because the whole garment is in the hands of every operator, and the most exposed to damage during handling.
Specifying where in the sequence the embellishment attaches is a scheduling decision as much as a design one — and it is the decision most often left implicit.
Sharing the window with the sewing line
Hand-embellished garments also pass through ordinary production: cutting, sewing, closures, finishing, inspection. The handwork window has to be planned around those stages rather than on top of them, which is why a style with heavy handwork sometimes shows an apparently generous lead time. It is not padding; the garment has to be in two places in sequence, and only one of those places can be the handwork bench.
Stage 2 — application and setting
This is the stage most buyers picture, and the one where estimates are most often wrong. Application is not a fixed operation — it is a rate, and the rate depends on four things.
| Factor | Effect on time |
|---|---|
| Area covered | Time scales with covered area, not with garment count |
| Density and repetition | A dense, regular pattern can be faster per square centimetre than a sparse, scattered one, because repetition builds rhythm |
| Irregularity | Gradients, scattered effects and asymmetric layouts are slow, because every placement is a decision |
| Materials | Beads, stones, sequins and cord behave differently under the needle or the hand, and a mixed layout changes tools mid-piece |
An estimate built from one sample piece assumes the sample piece was representative. On a run, the same layout is applied across a size range, and the largest size has the largest covered area. That difference is a real production cost, and it is worth quantifying before the order is confirmed rather than discovering it mid-run.
Finish and setting
Application is followed by setting — the steps that make the embellishment secure and the surface stable. Depending on the material this includes securing threads, removing strays, cleaning residue, and sometimes a controlled press or steam that does not damage the applied work. Setting is not optional and it is not free.
Why tension matters
One of the significant quality failures in hand application is not a dropped bead but tension. Work applied at slightly different tensions across a panel reads as a wave in the surface when the garment is worn, even though every component is present and correctly placed. This is why handwork is generally kept with a small group of operators on a single style rather than spread across a whole floor — consistency of hand matters as much as speed of hand.
It is worth being precise about the claim: tension is a major cause, not the only one and not always the most frequent. Coverage errors, orientation errors and attachment failures all occur, and which dominates depends on the technique. On adhesive-set stones, bond failure is the recurring fault; on beadwork in a regular pattern, a missing bead is; on appliqué, a lifting edge is.
Stage 3 — inspection and repair
Inspection of hand-embellished garments is slower per piece than for plain garments, and repair is slower still.
Inspection. Embellished work is checked for coverage, placement, security, orientation and surface condition. The practical difficulty is that inspection is visual over a complex surface: a missing bead in a dense area is hard to see, and an uneven tension wave is easiest to see under light and hardest to see on a flat bench. Garments are usually inspected hung rather than laid flat for exactly this reason.
Repair. Repair is skilled, local and visible. A dropped or damaged area cannot be hidden — it has to be rebuilt in place, matching the layout, density and material of its surroundings. Where the component is adhesive-set, a repair may not be possible invisibly at all, and the realistic remedy is replacement of the panel or the piece. Repair therefore consumes the same skilled hands as application, and competes for the same bench capacity.
The scheduling consequence is simple and often missed: the repair queue has to be planned with slack, or it lands on the critical path. Repair discovered at the end of a run, when the delivery is closest, is a common reason a hand-embellished order slips. Where repair is caught during the run, at the bench, it costs a fraction of the same repair discovered at final inspection.
How an embellishment artwork is specified
This is the document that decides whether the embellishment the run produces is the embellishment that was approved. It is also the document most often missing in a brief that otherwise looks complete, because the design is usually communicated as an image rather than as a placement instruction.
| # | What to state | Why it decides the outcome |
|---|---|---|
| 1 | Placement map — where the work sits, drawn on the pattern piece | An image shows the effect on one size. A map shows where it goes on the piece that will be cut |
| 2 | Reference point — what the placement is measured from | Centre front, shoulder seam or neckline. Without a stated datum, placement drifts between operators and between sizes |
| 3 | Distance from seam — how close components may sit to a seam line | This is what prevents components being cut or crushed when the seam is sewn, and what keeps the seam allowance clearable |
| 4 | Density — components per unit area, per zone | Drives weight, hand and time, and decides whether the garment still drapes |
| 5 | Component code — the exact reference, including size and finish | A change of component size is a change of layout, not a substitution |
| 6 | Orientation — which way a component faces | Decisive for sequins and faceted stones, which reflect differently and can read inconsistently under light |
| 7 | Size grading — how the layout behaves across the range | Whether the density holds, whether the motif scales, and whether the placement moves with the reference point |
| 8 | Approved master panel — a physical approved example of the finished zone | The thing the run is compared against, in the way an approved colour reference is |
Two of these deserve emphasis.
Without a reference point, placement drifts. A layout described only as a picture on a bodice will land differently on each garment, because each operator takes a different starting datum. Naming the datum costs one line.
Without an approved master panel, there is no reference. Every embellished run needs a physical piece that shows the approved density, orientation and finish. Photographs do not carry orientation and density reliably, and a master panel is what a new operator on the station is shown.
The size-grading item is the one buyers most often leave out, and it interacts directly with the pattern. A layout fixed per pattern piece keeps density roughly constant as sizes grow, which is usually what a design wants. A layout fixed in absolute terms — a motif of a set size placed at a fixed distance — holds its visual scale but changes its proportion to the garment. Neither is wrong; the choice has to be made. Where the layout has to hold across the range, it belongs in the same conversation as how size grading works from one approved sample, because the layout is being graded along with the block.
Attachment security and wear testing
Whether a component is still there after a season is not established by how it looks on the bench. Security is a property of the attachment method, the substrate and the care the garment will get — and it is worth testing before a run, not after a claim.
| What to test | What it tells you |
|---|---|
| Pull and security | Whether a component resists a defined pull, agreed between buyer and factory, without lifting or rotating. This is a floor, not a guarantee: passing a pull test is not the same as surviving wear |
| Snagging | Whether components catch on neighbouring fabric, on the garment's own lining, or on the inside of a bag or box |
| Abrasion | How the surface behaves where it rubs — under the arm, at the waist, against a seat, against an outer layer |
| Cleaning suitability | Whether the attachment survives the care method the garment will actually be given. Solvent cleaning stresses adhesive-set components differently from thread-set ones, and a bond that survives handling may not survive a solvent cycle |
| Skin-contact comfort | Sharp edges, claw settings and cut sequins against skin, and whether the interior needs a lining or a backing |
| Wear trial | A period of actual wear on a body. This is the most informative test of all, because a component that passes a static pull can still fail after movement, sitting and repeated handling |
Two practical notes.
Decide the care instruction with the application method, not after it. A garment on which stones are adhesive-set has a care requirement that follows from the adhesive, and the care label has to be settled before the run rather than written when the bulk arrives. Where the care instruction cannot accommodate the intended material, that is a design decision to make at the sampling stage, not a finishing problem.
Test on the sample, and treat the result as part of the approval. Security testing belongs in the sample approval record alongside coverage and density. A sample that is approved only on appearance has approved the look and left the attachment untested.
Where the calendar actually goes
This is the table to use when somebody asks why hand-embellished styles carry longer lead times. Each row is a real stage, and each one has a decision attached.
| Stage | What is happening | What a buyer can influence |
|---|---|---|
| Allocation | Bench and window assigned; competing styles identified | Ask which other embellished styles share the window |
| Pre-work | Materials, placement map and reference assembled; test piece worked | Provide the artwork specification and approve the master panel early |
| Application | Rate-limited handwork across panels or garments | Fix the route — pre-assembly, closed garment, or finished layer — before sampling |
| Setting | Securing, cleaning, controlled finishing | Confirm materials and finishing method in the spec |
| Inspection | Visual, hung, per piece | Agree the standard and where it is applied |
| Repair | Local rebuild, skilled hands, shared with application | Leave slack; catch defects during the run, not at the end |
What makes it slip
Five things account for most slippage on embellished styles:
- A placement map or reference approved late. Application cannot start until the layout is fixed and a master panel exists. A week lost here is a week off the end.
- An estimate built on a sample. The first piece is not the run rate, and the largest size is not the sample size.
- Two embellished styles in one window. They compete for the same benches.
- A technique chosen for its look rather than its repair profile. Adhesive-set components have the cheapest application and the most expensive failures.
- Repair discovered at the end. Rework with no slack lands directly on the delivery date.
None of these are exotic. They are what happens when handwork is treated as a finishing detail rather than a scheduled process.
What a handwork schedule actually looks like
Because handwork runs on benches rather than machines, its schedule has a different shape from a plain style's. Written out, it has four windows rather than one.
Window 1 — preparation. Materials and the placement map assembled, the master panel approved, a test piece worked. This window ends when the reference is approved, and everything downstream waits on it. It is the cheapest window to shorten and the most expensive to overrun.
Window 2 — application. The main bench window, sized on covered area, technique and layout, and running at the rate the run will sustain rather than the rate the sample suggested.
Window 3 — setting and cleaning. Securing, stray removal, residue cleaning, and any controlled finishing the materials allow. Short in days, but it involves the whole garment and cannot be compressed by adding hands.
Window 4 — inspection and repair. Visual inspection hung, plus local repair. This is the window with no natural floor: if repair has not been caught during application, it lands here, closest to the delivery date.
Laying it out this way makes the coupling visible. Window 2 cannot start before window 1 closes, and window 4 needs slack or it becomes the delivery date. A schedule expressed as a single "embellishment: X days" hides both facts, which is why those numbers tend to hold at quotation and fail in production.
How hand embellishment is costed
Handwork is usually quoted per garment, and that is where the estimate goes wrong. The cost driver is not the garment — it is technique × covered area × layout complexity × material handling, and the garment is only a container for those.
| Driver | What it does to cost | What to ask |
|---|---|---|
| Technique | Beading, appliqué, embroidery and stone work have different drivers — components, perimeter, stitch count | Which technique, and applied by hand or hand-guided? |
| Covered area | Scales with area, not with piece count | What area is being priced? |
| Layout complexity | Regular repeats are faster per square centimetre than scattered or gradient layouts | Is the layout regular, irregular, or graded? |
| Material | Beads, stones, sequins and cord differ in time, tooling and repair profile | Which components, and are they mixed? |
| Route | Panels before assembly is cheaper and safer than working a closed garment | Applied flat, on the finished garment, or in layers? |
| Repair allowance | Either priced in, or paid for later as a delay | Is there a repair window in the plan? |
Two consequences follow. A per-garment price is not comparable between factories unless the technique, route, layout and materials match — the same number can describe very different work. And the largest size in a run takes longer to embellish than the sample, so a price built from one sample understates the order by whatever the size curve adds. That is not a markup; it is area.
The practical move is to ask what the price covers, in those terms, before comparing it to anything else.
What to check on an embellishment sample
The sample is where the embellishment specification is either confirmed or quietly drifts. Six things are worth checking on the sample itself, before approval.
| What to check | Why the sample is the only place to see it |
|---|---|
| Coverage and placement against the map | Whether the layout matches on the real garment, not on a card |
| Tension across the panel | A flat bench hides waves; they show when the garment is hung |
| Orientation consistency | Whether components face the same way across a zone, which only reads under light |
| Weight and drape after application | The garment behaves differently once the embellishment is on it |
| Attachment security | Whether the sample survives a pull and a period of wear, not just handling |
| The boundary | Where embellished meets plain is either clean or it is not |
The weight item is the one most often missed. Embellishment adds mass where it is applied, and a bodice drafted for a light face cloth will behave differently once several thousand beads sit on it. The sample is where that becomes visible, and adjusting the build then is far cheaper than discovering it in bulk — how structured bodices are made in womenswear covers the build that has to carry the extra mass. An embellished sample is also a development round rather than a confirmation, for the same reason: how a factory creates a first garment sample explains which round is which.
The handover checklist
Everything above reduces to one page, agreed before the handwork window opens. This is the list to complete at handover rather than to discover at inspection.
| # | Item | Confirmed when |
|---|---|---|
| 1 | Technique named, and hand-applied versus hand-guided stated | Before quotation, so prices are comparable |
| 2 | Route fixed — panels before assembly, closed garment, or finished layer | Before sampling |
| 3 | Placement map on the pattern pieces, with a named reference point | Before window 1 closes |
| 4 | Seam clearance rule stated — how close components may sit to a seam | Before window 1 closes |
| 5 | Density per zone, and component codes with size and finish | Before window 1 closes |
| 6 | Orientation rule for components that reflect directionally | Before application starts |
| 7 | Size-grading behaviour of the layout agreed | Before the size set is made |
| 8 | Approved master panel held by the factory and by the buyer | Before application starts |
| 9 | Attachment testing done on the sample, with the result recorded | At sample approval |
| 10 | Care instruction settled with the application method | Before bulk |
| 11 | Inspection standard for coverage, placement, security, surface | Before window 4 |
| 12 | Repair window with slack, and who holds it | In the schedule, not after it |
Twelve lines. Rows 1 to 3 and 12 are the ones that decide the date; rows 4 to 10 are the ones that decide whether the run needs reworking. A handwork order that goes ahead without rows 8 and 12 has agreed to apply work to an unapproved reference and to repair it in the delivery window — which is where the opening example came from.
If you are developing an embellished style, send the design and the reference you have and we will tell you what the technique does to the calendar and to the panel underneath it. Sampling for embellished styles follows the same loop as everything else — sampling covers what each round is for — and how long womenswear manufacturing takes sets out where handwork sits in the full sequence. For the sequence the garments travel through around the bench, how the manufacturing process runs from design to finished garment is the companion piece, and quality control covers how coverage, placement and security are inspected. Where the work sits on a structured garment, how structured bodices are made in womenswear explains the build that has to carry it, and how sequin dresses are manufactured covers the machine routes when a design does not need hand application.